本文最后更新于:1 个月前
阿里云存储OSS
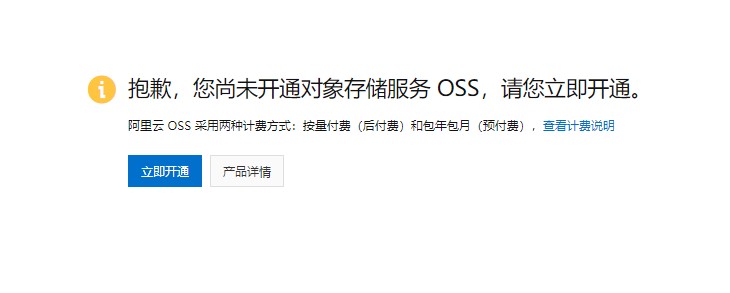
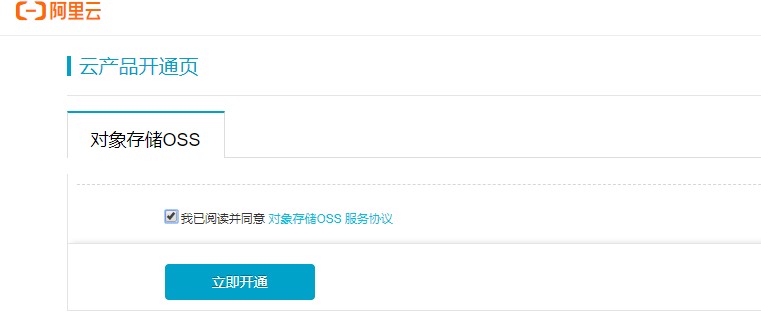
一、开通“对象存储OSS”服务
为了解决海量数据存储与弹性扩容,项目中我们采用云存储的解决方案- 阿里云OSS。
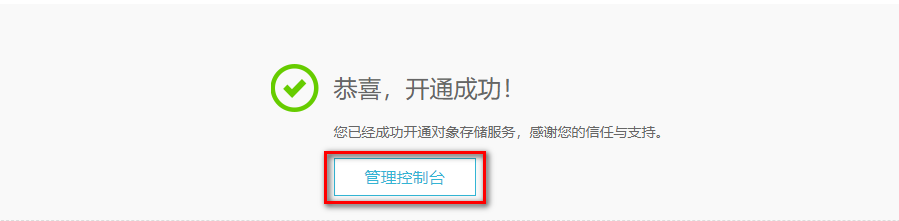
1、开通“对象存储OSS”服务
2、进入管理控制台
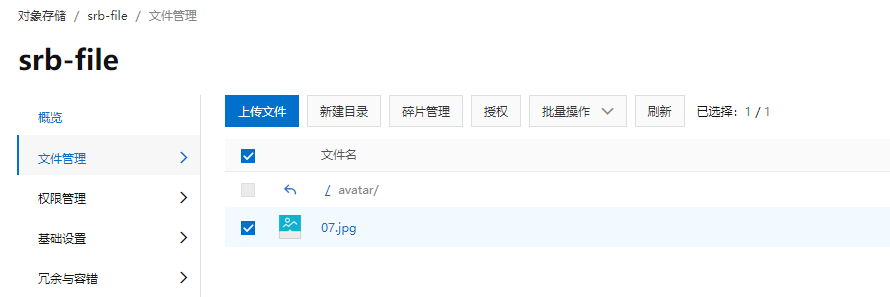
二、控制台使用
1、创建Bucket
命名:srb-file
读写权限:公共读
2、上传默认头像
创建文件夹avatar,上传默认的用户头像
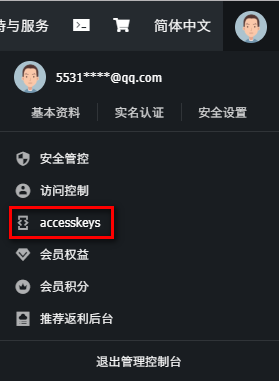
三、使用RAM子用户
1、进入子用户管理页面
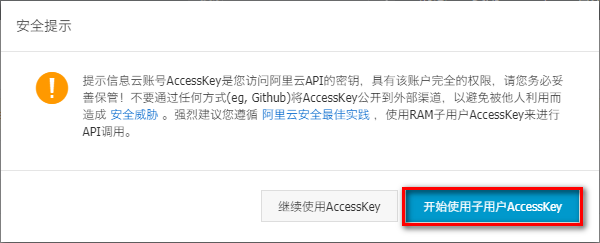
2、添加用户
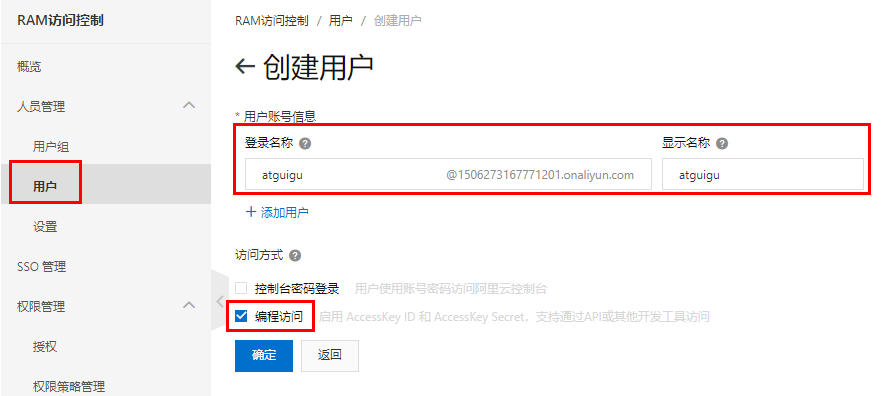
3、获取子用户key
AccessKeyId, AccessKeySecret
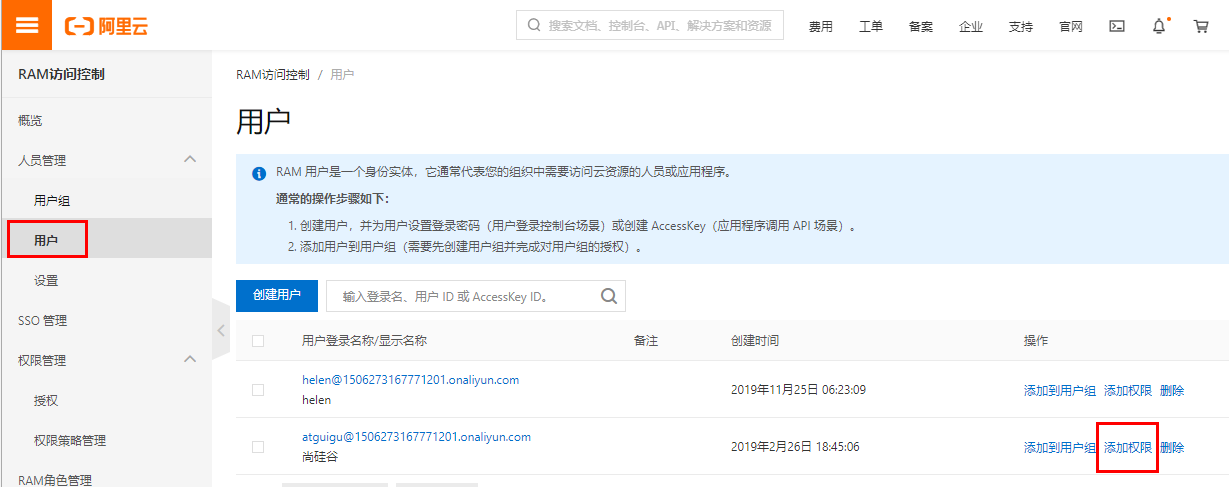
4、设置用户权限
AliyunOSSFullAccess
使用SDK访问OSS
一、使用SDK
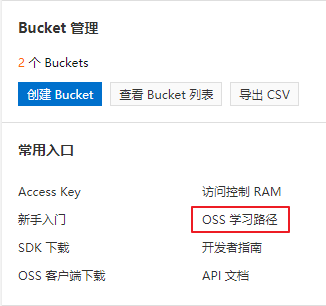
在OSS的概览页右下角找到“Bucket管理”,点击“OSS学习路径”
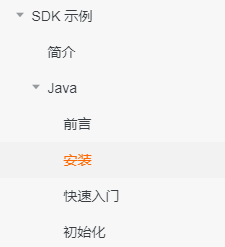
点击“Java SDK”进入SDK开发文档

二、创建测试项目
1、创建Maven项目
com.atguigu
aliyun-oss
2、配置pom
1
2
3
4
5
6
7
8
9
10
11
12
13
| <dependencies>
<dependency>
<groupId>com.aliyun.oss</groupId>
<artifactId>aliyun-sdk-oss</artifactId>
<version>3.10.2</version>
</dependency>
<dependency>
<groupId>junit</groupId>
<artifactId>junit</artifactId>
<version>4.12</version>
</dependency>
</dependencies>
|
三、测试用例
1、创建Bucket
1
2
3
4
5
6
7
8
9
10
11
12
13
14
15
16
17
18
19
| package com.atguigu.aliyunoss;
public class OSSTest {
String endpoint = "your endpoint";
String accessKeyId = "your accessKeyId";
String accessKeySecret = "your accessKeySecret";
String bucketName = "srb-file";
@Test
public void testCreateBucket() {
OSS ossClient = new OSSClientBuilder().build(endpoint, accessKeyId, accessKeySecret);
ossClient.createBucket(bucketName);
ossClient.shutdown();
}
}
|
2、判断bucket是否存在
1
2
3
4
5
6
7
8
9
| @Test
public void testExist() {
OSS ossClient = new OSSClientBuilder().build(endpoint, accessKeyId, accessKeySecret);
boolean exists = ossClient.doesBucketExist(bucketName);
System.out.println(exists);
ossClient.shutdown();
}
|
3、设置bucket访问权限
1
2
3
4
5
6
7
8
9
| @Test
public void testAccessControl() {
OSS ossClient = new OSSClientBuilder().build(endpoint, accessKeyId, accessKeySecret);
ossClient.setBucketAcl(bucketName, CannedAccessControlList.PublicRead);
ossClient.shutdown();
}
|
创建OSS微服务
一、新建云存储微服务
1、创建模块
service-oss
2、配置pom.xml
1
2
3
4
5
6
7
8
9
10
11
12
13
14
15
16
17
18
19
20
21
22
23
24
25
26
27
28
29
30
31
32
33
| <dependencies>
<dependency>
<groupId>com.atguigu</groupId>
<artifactId>service-base</artifactId>
<version>0.0.1-SNAPSHOT</version>
</dependency>
<dependency>
<groupId>org.springframework.boot</groupId>
<artifactId>spring-boot-starter-web</artifactId>
</dependency>
<dependency>
<groupId>org.projectlombok</groupId>
<artifactId>lombok</artifactId>
</dependency>
<dependency>
<groupId>com.aliyun.oss</groupId>
<artifactId>aliyun-sdk-oss</artifactId>
</dependency>
<dependency>
<groupId>joda-time</groupId>
<artifactId>joda-time</artifactId>
</dependency>
<dependency>
<groupId>org.springframework.boot</groupId>
<artifactId>spring-boot-configuration-processor</artifactId>
<optional>true</optional>
</dependency>
</dependencies>
|
3、配置application.yml
1
2
3
4
5
6
7
8
9
10
11
12
13
| server:
port: 8130
spring:
profiles:
active: dev
application:
name: service-oss
aliyun:
oss:
endpoint: 你的endponit
keyId: 你的阿里云keyid
keySecret: 你的阿里云keysecret
bucketName: srb-file
|
4、logback-spring.xml
修改日志路径为 srb_log/oss
5、创建启动类
创建ServiceOssApplication.java
1
2
3
4
5
6
7
8
| package com.atguigu.srb.oss;
@SpringBootApplication
@ComponentScan({"com.atguigu.srb", "com.atguigu.common"})
public class ServiceOssApplication {
public static void main(String[] args) {
SpringApplication.run(ServiceOssApplication.class, args);
}
}
|
6、启动项目
二、实现文件上传
1、从配置文件读取常量
创建常量读取工具类:OssProperties.java
1
2
3
4
5
6
7
8
9
10
11
12
13
14
15
16
17
18
19
20
21
22
23
| package com.atguigu.srb.oss.util;
@Setter
@Getter
@Component
@ConfigurationProperties(prefix = "aliyun.oss")
public class OssProperties implements InitializingBean {
private String endpoint;
private String keyId;
private String keySecret;
private String bucketName;
public static String ENDPOINT;
public static String KEY_ID;
public static String KEY_SECRET;
public static String BUCKET_NAME;
@Override
public void afterPropertiesSet() throws Exception {
ENDPOINT = endpoint;
KEY_ID = keyId;
KEY_SECRET = keySecret;
BUCKET_NAME = bucketName;
}
}
|
2、文件上传业务
创建Service接口:FileService.java
1
2
3
4
5
6
7
| package com.atguigu.srb.oss.service;
public interface FileService {
String upload(InputStream inputStream, String module, String fileName);
}
|
实现:FileServiceImpl.java
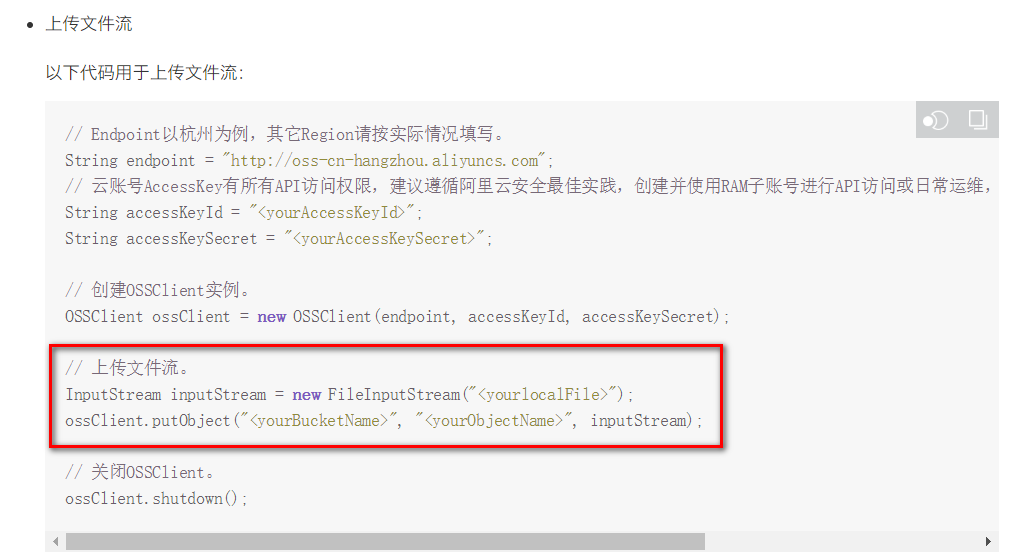
参考SDK中的:Java->上传文件->简单上传->流式上传->上传文件流
1
2
3
4
5
6
7
8
9
10
11
12
13
14
15
16
17
18
19
20
21
22
23
24
25
26
27
28
29
30
31
32
33
34
| package com.atguigu.srb.oss.service.impl;
@Service
public class FileServiceImpl implements FileService {
@Override
public String upload(InputStream inputStream, String module, String fileName) {
OSS ossClient = new OSSClientBuilder().build(
OssProperties.ENDPOINT,
OssProperties.KEY_ID,
OssProperties.KEY_SECRET);
if(!ossClient.doesBucketExist(OssProperties.BUCKET_NAME)){
ossClient.createBucket(OssProperties.BUCKET_NAME);
ossClient.setBucketAcl(OssProperties.BUCKET_NAME, CannedAccessControlList.PublicRead);
}
String folder = new DateTime().toString("yyyy/MM/dd");
fileName = UUID.randomUUID().toString() + fileName.substring(fileName.lastIndexOf("."));
String key = module + "/" + folder + "/" + fileName;
ossClient.putObject(OssProperties.BUCKET_NAME, key, inputStream);
ossClient.shutdown();
return "https://" + OssProperties.BUCKET_NAME + "." + OssProperties.ENDPOINT + "/" + key;
}
}
|
3、控制层
创建controller.admin:FileController.java
1
2
3
4
5
6
7
8
9
10
11
12
13
14
15
16
17
18
19
20
21
22
23
24
25
26
27
28
29
| package com.atguigu.srb.oss.controller.api;
@Api(tags = "阿里云文件管理")
@CrossOrigin
@RestController
@RequestMapping("/api/oss/file")
public class FileController {
@Resource
private FileService fileService;
@ApiOperation("文件上传")
@PostMapping("/upload")
public R upload(
@ApiParam(value = "文件", required = true)
@RequestParam("file") MultipartFile file,
@ApiParam(value = "模块", required = true)
@RequestParam("module") String module) {
try {
InputStream inputStream = file.getInputStream();
String originalFilename = file.getOriginalFilename();
String uploadUrl = fileService.upload(inputStream, module, originalFilename);
return R.ok().message("文件上传成功").data("url", uploadUrl);
} catch (IOException e) {
throw new BusinessException(ResponseEnum.UPLOAD_ERROR, e);
}
}
}
|
4、Swagger测试
三、实现文件删除
1、业务层
Service接口:FileService.java
1
2
3
4
5
|
void removeFile(String url);
|
实现:FileServiceImpl.java
1
2
3
4
5
6
7
8
9
10
11
12
13
14
15
16
17
18
19
20
21
22
23
24
25
|
@Override
public void removeFile(String url) {
OSS ossClient = new OSSClientBuilder().build(
OssProperties.ENDPOINT,
OssProperties.KEY_ID,
OssProperties.KEY_SECRET);
int i = url.indexOf(".com/");
String substring = url.substring(i + 5);
try {
substring = URLDecoder.decode(substring, "utf-8");
} catch (UnsupportedEncodingException e) {
e.printStackTrace();
}
ossClient.deleteObject(OssProperties.BUCKET_NAME, substring);
ossClient.shutdown();
}
|
2、控制层
1
2
3
4
5
6
7
8
| @ApiOperation("删除OSS文件")
@DeleteMapping("/remove")
public R remove(
@ApiParam(value = "要删除的文件路径", required = true)
@RequestParam("url") String url) {
fileService.removeFile(url);
return R.ok().message("删除成功");
}
|