本文最后更新于:2 个月前
Spring Security简介
Spring Security是 Spring提供的安全认证服务的框架。 使用Spring Security可以帮助我们来简化认证和授权的过程。官网:https://spring.io/projects/spring-security
中文官网:https://www.w3cschool.cn/springsecurity/
对应的maven坐标:
1
2
3
4
5
6
7
8
9
10
| <dependency>
<groupId>org.springframework.security</groupId>
<artifactId>spring-security-web</artifactId>
<version>5.0.5.RELEASE</version>
</dependency>
<dependency>
<groupId>org.springframework.security</groupId>
<artifactId>spring-security-config</artifactId>
<version>5.0.5.RELEASE</version>
</dependency>
|
常用的权限框架除了Spring Security,还有Apache的shiro框架。
- SpringSecurity是Spring家族的一个安全框架, 简化我们开发里面的认证和授权过程
- SpringSecurity内部封装了Filter(只需要在web.xml容器中配置一个过滤器–代理过滤器,真实的过滤器在spring的容器中配置)
- 常见的安全框架
- Spring的
SpringSecurity
- Apache的Shiro
http://shiro.apache.org/
Spring Security入门案例
【需求】
使用Spring Security进行控制: 网站(一些页面)需要登录才能访问(认证)
- 创建Maven工程
spring_security_demo,导入坐标
- 配置
web.xml (前端控制器, SpringSecurity相关的过滤器)
- 创建
spring-security.xml(核心)
入门案例
创建maven工程,打包方式为war。
pom.xml
1
2
3
4
5
6
7
8
9
10
11
12
13
14
15
16
17
18
19
20
21
22
23
24
25
26
27
28
29
30
31
32
33
34
35
36
37
38
39
40
41
42
43
44
45
46
47
48
49
50
51
52
53
54
55
56
57
58
59
60
61
62
63
64
65
66
67
68
69
70
71
72
| <packaging>war</packaging>
<properties>
<spring.version>5.0.5.RELEASE</spring.version>
<project.build.sourceEncoding>UTF-8</project.build.sourceEncoding>
<maven.compiler.source>1.8</maven.compiler.source>
<maven.compiler.target>1.8</maven.compiler.target>
</properties>
<dependencies>
<dependency>
<groupId>org.springframework</groupId>
<artifactId>spring-core</artifactId>
<version>${spring.version}</version>
</dependency>
<dependency>
<groupId>org.springframework</groupId>
<artifactId>spring-web</artifactId>
<version>${spring.version}</version>
</dependency>
<dependency>
<groupId>org.springframework</groupId>
<artifactId>spring-webmvc</artifactId>
<version>${spring.version}</version>
</dependency>
<dependency>
<groupId>org.springframework</groupId>
<artifactId>spring-context-support</artifactId>
<version>${spring.version}</version>
</dependency>
<dependency>
<groupId>org.springframework</groupId>
<artifactId>spring-test</artifactId>
<version>${spring.version}</version>
</dependency>
<dependency>
<groupId>org.springframework</groupId>
<artifactId>spring-jdbc</artifactId>
<version>${spring.version}</version>
</dependency>
<dependency>
  <groupId>org.springframework.security</groupId>
  <artifactId>spring-security-web</artifactId>
  <version>5.0.5.RELEASE</version>
</dependency>
<dependency>
  <groupId>org.springframework.security</groupId>
  <artifactId>spring-security-config</artifactId>
  <version>5.0.5.RELEASE</version>
</dependency>
<dependency>
<groupId>javax.servlet</groupId>
<artifactId>servlet-api</artifactId>
<version>2.5</version>
<scope>provided</scope>
</dependency>
</dependencies>
<build>
<plugins>
<plugin>
<groupId>org.apache.tomcat.maven</groupId>
<artifactId>tomcat7-maven-plugin</artifactId>
<configuration>
<port>85</port>
<path>/</path>
</configuration>
</plugin>
</plugins>
</build>
|
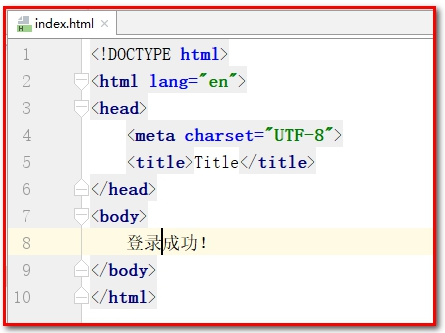
内置提供 index.html 页面,内容为“登录成功”!!
配置web.xml
1:DelegatingFilterProxy用于整合第三方框架(代理过滤器,非真正的过滤器,真正的过滤器需要在spring的配置文件)==
2:springmvc的核心控制器
在web.xml 中主要配置 SpringMVC 的 DispatcherServlet 和用于整合第三方框架的DelegatingFilterProxy(代理过滤器,真正的过滤器在spring的配置文件),用于整合Spring Security。
1
2
3
4
5
6
7
8
9
10
11
12
13
14
15
16
17
18
19
20
21
22
23
24
25
26
27
28
29
30
31
32
33
34
| <?xml version="1.0" encoding="UTF-8"?>
<web-app xmlns:xsi="http://www.w3.org/2001/XMLSchema-instance"
xmlns="http://java.sun.com/xml/ns/javaee"
xsi:schemaLocation="http://java.sun.com/xml/ns/javaee http://java.sun.com/xml/ns/javaee/web-app_3_0.xsd"
id="WebApp_ID" version="3.0">
<filter>
<filter-name>springSecurityFilterChain</filter-name>
<filter-class>org.springframework.web.filter.DelegatingFilterProxy</filter-class>
</filter>
<filter-mapping>
<filter-name>springSecurityFilterChain</filter-name>
<url-pattern>/*</url-pattern>
</filter-mapping>
<servlet>
<servlet-name>springmvc</servlet-name>
<servlet-class>org.springframework.web.servlet.DispatcherServlet</servlet-class>
<init-param>
<param-name>contextConfigLocation</param-name>
<param-value>classpath:spring-security.xml</param-value>
</init-param>
<load-on-startup>1</load-on-startup>
</servlet>
<servlet-mapping>
<servlet-name>springmvc</servlet-name>
<url-pattern>*.do</url-pattern>
</servlet-mapping>
</web-app>
|
配置spring-security.xml
1:定义哪些链接可以放行
2:定义哪些链接不可以放行,即需要有角色、权限才可以放行
3:认证管理,定义登录账号名和密码,并授予访问的角色、权限
在 spring-security.xml 中主要配置 Spring Security 的拦截规则和认证管理器。
1
2
3
4
5
6
7
8
9
10
11
12
13
14
15
16
17
18
19
20
21
22
23
24
25
26
27
28
29
30
31
32
33
34
35
36
37
38
39
40
41
42
43
44
45
46
47
48
49
50
51
52
53
54
55
56
57
| <?xml version="1.0" encoding="UTF-8"?>
<beans xmlns="http://www.springframework.org/schema/beans"
xmlns:xsi="http://www.w3.org/2001/XMLSchema-instance"
xmlns:context="http://www.springframework.org/schema/context"
xmlns:dubbo="http://code.alibabatech.com/schema/dubbo"
xmlns:mvc="http://www.springframework.org/schema/mvc"
xmlns:security="http://www.springframework.org/schema/security"
xsi:schemaLocation="http://www.springframework.org/schema/beans
http://www.springframework.org/schema/beans/spring-beans.xsd
http://www.springframework.org/schema/mvc
http://www.springframework.org/schema/mvc/spring-mvc.xsd
http://code.alibabatech.com/schema/dubbo
http://code.alibabatech.com/schema/dubbo/dubbo.xsd
http://www.springframework.org/schema/context
http://www.springframework.org/schema/context/spring-context.xsd
http://www.springframework.org/schema/security
http://www.springframework.org/schema/security/spring-security.xsd">
<security:http auto-config="true" use-expressions="true">
<security:intercept-url pattern="/**" access="hasRole('ROLE_ADMIN')"></security:intercept-url>
</security:http>
<security:authentication-manager>
<security:authentication-provider>
<security:user-service>
<security:user name="admin" authorities="ROLE_ADMIN" password="admin"></security:user>
</security:user-service>
</security:authentication-provider>
</security:authentication-manager>
</beans>
|
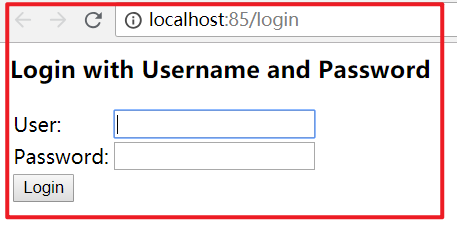
请求 url 地址:http://localhost:85/
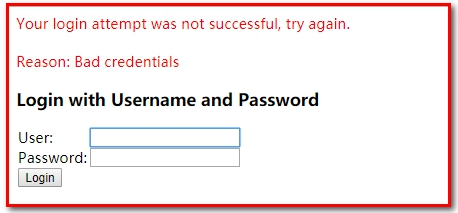
输入错误用户名和密码
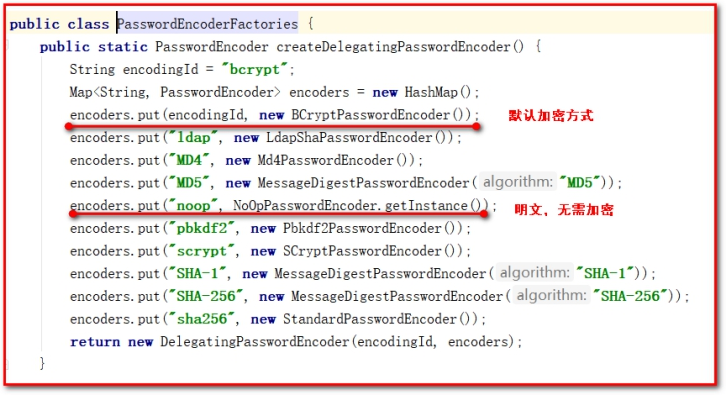
输入正确用户名和密码(admin/admin),因为 spring security 提供了一套安全机制,登录的时候进行了拦截,参考系统源码PasswordEncoderFactories

需要修改配置文件
1
| <security:user name="admin" authorities="ROLE_ADMIN" password="{noop}admin"></security:user>
|
输入正确用户名和密码(admin/admin),缺少资源
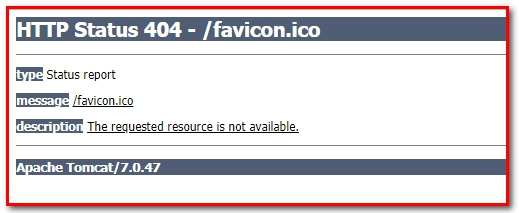
此时说明没有登录成功的页面。
{noop}:表示当前使用的密码为明文。表示当前密码不需要加密 PasswordEncoderFactories
在 webapp 文件夹下面,新建 index.html ,可以正常访问 index.html
使用步骤
- 创建Maven工程, 添加坐标
- 配置web.xml(前端控制器,==springSecurity权限相关的过滤器==)
- 创建spring-security.xml(自动配置,使用表达式的方式完成授权,只要具有ROLE_ADMIN的角色权限才能访问系统中的所有功能; 授权管理器,指定用户名admin,密码admin,具有ROLE_ADMIN的角色权限)
注意实现
1.在web.xml里面配置的权限相关的过滤器名字==不能改==(springSecurityFilterChain)
1
2
3
4
5
6
7
8
| <filter>
<filter-name>springSecurityFilterChain</filter-name>
<filter-class>org.springframework.web.filter.DelegatingFilterProxy</filter-class>
</filter>
<filter-mapping>
<filter-name>springSecurityFilterChain</filter-name>
<url-pattern>/*</url-pattern>
</filter-mapping>
|
2.入门案例里面没有指定密码加密方式的. 配置密码的时候的加=={noop}==
1
2
3
| <security:user-service>
<security:user name="admin" password="{noop}admin" authorities="ROLE_ADMIN"/>
</security:user-service>
|
Spring Security进阶
前面我们已经完成了Spring Security的入门案例,通过入门案例我们可以看到,Spring Security将我们项目中的所有资源都保护了起来,要访问这些资源必须要完成认证而且需要具有ROLE_ADMIN角色。
但是入门案例中的使用方法离我们真实生产环境还差很远,还存在如下一些问题:
1、项目中我们将所有的资源(所有请求URL)都保护起来,实际环境下往往有一些资源不需要认证也可以访问,也就是可以匿名访问。
2、登录页面是由框架生成的,而我们的项目往往会使用自己的登录页面。
3、直接将用户名和密码配置在了配置文件中,而真实生产环境下的用户名和密码往往保存在数据库中。
4、在配置文件中配置的密码使用明文,这非常不安全,而真实生产环境下密码需要进行加密。
需要对这些问题进行改进。
- 配置可匿名访问的资源(不需要登录,权限 角色 就可以访问的资源)
- 使用指定的登录页面(login.html)
- 从数据库查询用户信息
- 对密码进行加密
- 配置多种校验规则(对访问的页面做权限控制)
- 注解方式权限控制(对访问的Controller类做权限控制)
- 退出登录
配置可匿名访问的资源
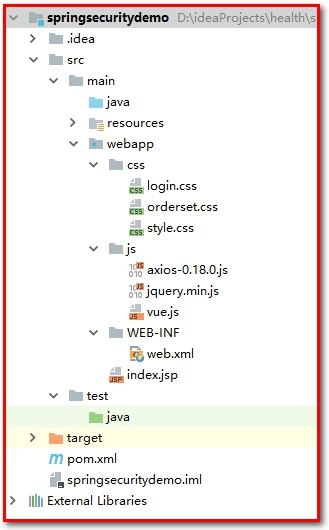
1:在项目中创建js、css目录并在两个目录下提供任意一些测试文件
2:在spring-security.xml文件中配置,指定哪些资源可以匿名访问
第一步:在项目中创建js、css目录并在两个目录下提供任意一些测试文件
把 meinian_web 项目里面的 js 和 css 文件夹 拷贝到项目中
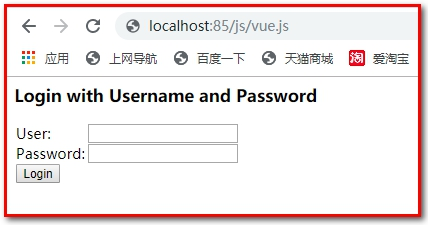
访问http://localhost:85/js/vue.js
请求 vue.js 文件 ,发现被拦截不能访问
第二步:在spring-security.xml文件中配置,指定哪些资源可以匿名访问
1
2
3
4
5
6
|
<security:http security="none" pattern="/js/**" />
<security:http security="none" pattern="/css/**" />
|
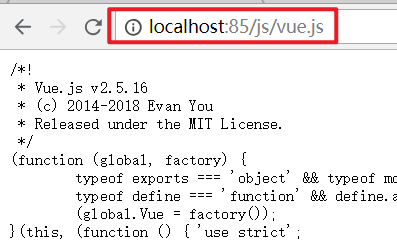
通过上面的配置可以发现,js和css目录下的文件可以在没有认证的情况下任意访问。
使用指定的登录页面
- 在webapp文件夹下面,提供login.html作为项目的登录页面
- 修改spring-security.xml文件,指定login.html页面可以匿名访问
- 修改spring-security.xml文件,加入表单登录信息的配置
- 修改spring-security.xml文件,关闭csrfFilter过滤器
第一步:提供login.html作为项目的登录页面
1:用户名是username
2:密码是password
3:登录的url是login.do
1
2
3
4
5
6
7
8
9
10
11
12
13
14
| <!DOCTYPE html>
<html>
<head>
<meta charset="UTF-8">
<title>登录</title>
</head>
<body>
<form action="/login.do" method="post">
username:<input type="text" name="username"><br>
password:<input type="password" name="password"><br>
<input type="submit" value="submit">
</form>
</body>
</html>
|
第二步:修改spring-security.xml文件,指定login.html页面可以匿名访问,否则无法访问。
1
| <security:http security="none" pattern="/login.html" />
|
第三步:修改spring-security.xml文件,加入表单登录信息的配置
1
2
3
4
5
6
7
8
9
10
11
12
13
14
15
16
17
18
19
20
21
22
23
24
25
26
27
28
29
30
31
32
33
34
35
36
37
38
39
40
41
42
43
44
45
46
47
48
49
50
51
52
53
54
55
56
| <?xml version="1.0" encoding="UTF-8"?>
<beans xmlns="http://www.springframework.org/schema/beans"
xmlns:xsi="http://www.w3.org/2001/XMLSchema-instance"
xmlns:context="http://www.springframework.org/schema/context"
xmlns:dubbo="http://code.alibabatech.com/schema/dubbo"
xmlns:mvc="http://www.springframework.org/schema/mvc"
xmlns:security="http://www.springframework.org/schema/security"
xsi:schemaLocation="http://www.springframework.org/schema/beans
http://www.springframework.org/schema/beans/spring-beans.xsd
http://www.springframework.org/schema/mvc
http://www.springframework.org/schema/mvc/spring-mvc.xsd
http://code.alibabatech.com/schema/dubbo
http://code.alibabatech.com/schema/dubbo/dubbo.xsd
http://www.springframework.org/schema/context
http://www.springframework.org/schema/context/spring-context.xsd
http://www.springframework.org/schema/security
http://www.springframework.org/schema/security/spring-security.xsd">
<security:http security="none" pattern="/login.html" />
<security:http security="none" pattern="/js/**" />
<security:http security="none" pattern="/css/**" />
<security:http auto-config="true" use-expressions="true">
<security:intercept-url pattern="/**" access="hasRole('ROLE_ADMIN')"></security:intercept-url>
<security:form-login login-page="/login.html"
username-parameter="username"
password-parameter="password"
login-processing-url="/login.do"
default-target-url="/index.html"
authentication-failure-url="/login.html"
always-use-default-target="true"
/>
<security:csrf disabled="true"></security:csrf>
</security:http>
|
注意1:
如果用户名和密码输入正确。抛出异常: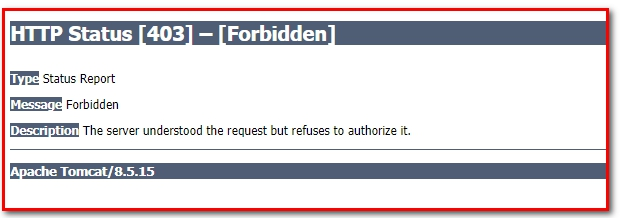
分析原因:

Spring-security采用盗链机制,其中_csrf使用token标识和随机字符,每次访问页面都会随机生成,然后和服务器进行比较,成功可以访问,不成功不能访问。
解决方案:
1
2
|
<security:csrf disabled="true" />
|

从数据库查询用户信息
- 定义UserService类,实现UserDetailsService接口。
- 修改spring-security.xml配置(注入UserService)
如果我们要从数据库动态查询用户信息,就必须按照spring security框架的要求提供一个实现UserDetailsService接口的实现类,并按照框架的要求进行配置即可。框架会自动调用实现类中的方法并自动进行密码校验。
第一步:创建java bean对象
1
2
3
4
5
6
| public class User {
private String username;
private String password;
private String telephone;
}
|
第二步:定义UserService类,实现UserDetailsService接口。
1
2
3
4
5
6
7
8
9
10
11
12
13
14
15
16
17
18
19
20
21
22
23
24
25
26
27
28
29
30
31
32
33
34
35
36
37
38
39
40
41
42
43
44
45
46
47
48
49
50
51
52
| @Component
public class UserService implements UserDetailsService {
static Map<String,com.atguigu.pojo.User> map = new HashMap<String,com.atguigu.pojo.User>();
static {
com.atguigu.pojo.User user1 = new com.atguigu.pojo.User();
user1.setUsername("admin");
user1.setPassword("admin");
user1.setTelephone("123");
com.atguigu.pojo.User user2 = new com.atguigu.pojo.User();
user2.setUsername("zhangsan");
user2.setPassword("123");
user2.setTelephone("321");
map.put(user1.getUsername(),user1);
map.put(user2.getUsername(),user2);
}
@Override
public UserDetails loadUserByUsername(String username) throws UsernameNotFoundException {
System.out.println("username"+username);
com.atguigu.pojo.User userInDb = map.get(username);
if (userInDb==null){
return null;
}
String passwordInDb ="{noop}" + userInDb.getPassword();
List<GrantedAuthority> lists = new ArrayList<>();
lists.add(new SimpleGrantedAuthority("add"));
lists.add(new SimpleGrantedAuthority("delete"));
lists.add(new SimpleGrantedAuthority("ROLE_ADMIN"));
return new User(username,passwordInDb,lists);
}
}
|
第三步:spring-security.xml:
1
2
3
4
5
6
7
8
9
10
11
12
13
|
<security:authentication-manager>
<security:authentication-provider user-service-ref="userService">
</security:authentication-provider>
</security:authentication-manager>
<context:component-scan base-package="com"/>
|
本章节我们提供了UserService实现类,并且按照框架的要求实现了UserDetailsService接口。在spring配置文件中注册UserService,指定其作为认证过程中根据用户名查询用户信息的处理类。当我们进行登录操作时,spring security框架会调用UserService的loadUserByUsername方法查询用户信息,并根据此方法中提供的密码和用户页面输入的密码进行比对来实现认证操作。
对密码进行加密
前面我们使用的密码都是明文的,这是非常不安全的。一般情况下用户的密码需要进行加密后再保存到数据库中。
常见的密码加密方式有:
3DES、AES、DES:使用对称加密算法,可以通过解密来还原出原始密码
MD5、SHA1:使用单向HASH算法,无法通过计算还原出原始密码,但是可以建立彩虹表进行查表破解
MD5可进行加盐加密,保证安全
1
2
3
4
5
6
7
8
9
| public class TestMD5 {
@Test
public void testMD5(){
System.out.println(MD5Utils.md5("1234xiaowang"));
System.out.println(MD5Utils.md5("1234xiaoli"));
}
}
|
同样的密码值,盐值不同,加密的结果不同。
bcrypt:将salt随机并混入最终加密后的密码,验证时也无需单独提供之前的salt,从而无需单独处理salt问题
spring security中的BCryptPasswordEncoder方法采用SHA-256 +随机盐+密钥对密码进行加密。SHA系列是Hash算法,不是加密算法,使用加密算法意味着可以解密(这个与编码/解码一样),但是采用Hash处理,其过程是不可逆的。
**(1)加密(encode)**:注册用户时,使用SHA-256+随机盐+密钥把用户输入的密码进行hash处理,得到密码的hash值,然后将其存入数据库中。
**(2)密码匹配(matches)**:用户登录时,密码匹配阶段并没有进行密码解密(因为密码经过Hash处理,是不可逆的),而是使用相同的算法把用户输入的密码进行hash处理,得到密码的hash值,然后将其与从数据库中查询到的密码hash值进行比较。如果两者相同,说明用户输入的密码正确。
这正是为什么处理密码时要用hash算法,而不用加密算法。因为这样处理即使数据库泄漏,黑客也很难破解密码。
在 meinian_common项目的 test 文件夹下面新建测试代码
1
2
3
4
5
6
7
8
9
10
11
12
13
14
15
16
17
18
19
20
| import org.junit.Test;
import org.springframework.security.crypto.bcrypt.BCryptPasswordEncoder;
public class TestSpringSecurity {
@Test
public void testSpringSecurity(){
BCryptPasswordEncoder encoder = new BCryptPasswordEncoder();
String s = encoder.encode("abc");
System.out.println(s);
String s1 = encoder.encode("abc");
System.out.println(s1);
boolean b = encoder.matches("abc", "$2a$10$dyIf5fOjCRZs/pYXiBYy8uOiTa1z7I.mpqWlK5B/0icpAKijKCgxe");
System.out.println(b);
}
}
|
加密后的格式一般为:
1
| $2a$10$/bTVvqqlH9UiE0ZJZ7N2Me3RIgUCdgMheyTgV0B4cMCSokPa.6oCa
|
加密后字符串的长度为固定的60位。其中:
$是分割符,无意义;
2a是bcrypt加密版本号;
10是cost的值;
而后的前22位是salt值;
再然后的字符串就是密码的密文了。
实现步骤:
1:在spring-security.xml文件中指定密码加密对象
2:修改UserService实现类
第一步:在spring-security.xml文件中指定密码加密对象
1
2
3
4
5
6
7
8
9
10
11
12
13
14
15
16
17
|
<security:authentication-manager>
<security:authentication-provider user-service-ref="userService">
<security:password-encoder ref="passwordEncoder"></security:password-encoder>
</security:authentication-provider>
</security:authentication-manager>
<bean id="passwordEncoder"
class="org.springframework.security.crypto.bcrypt.BCryptPasswordEncoder" />
|
第二步:修改UserService实现类
1
2
3
4
5
6
7
8
9
10
11
12
13
14
15
16
17
18
19
20
21
22
23
24
25
26
27
28
29
30
31
32
33
34
35
36
37
38
39
40
41
42
43
44
45
46
47
48
49
50
51
52
53
| @Component
public class UserService implements UserDetailsService {
static Map<String,com.atguigu.pojo.User> map = new HashMap<String,com.atguigu.pojo.User>();
static {
com.atguigu.pojo.User user1 = new com.atguigu.pojo.User();
user1.setUsername("admin");
user1.setPassword("$2a$10$kRdUwbkOu8f.TRNHthPKquJE5yObiKov29Fo5qrnQK2j2qkjZLuEG");
user1.setTelephone("123");
com.atguigu.pojo.User user2 = new com.atguigu.pojo.User();
user2.setUsername("zhangsan");
user2.setPassword("$2a$10$ay1JuL6FQHEVq7HorZGWZ.W0HgvXtwtfmzbe8R5H3on5nUtG/ZXDK");
user2.setTelephone("321");
map.put(user1.getUsername(),user1);
map.put(user2.getUsername(),user2);
}
@Override
public UserDetails loadUserByUsername(String username) throws UsernameNotFoundException {
System.out.println("username"+username);
com.atguigu.pojo.User userInDb = map.get(username);
if (userInDb==null){
return null;
}
String passwordInDb = userInDb.getPassword();
List<GrantedAuthority> lists = new ArrayList<>();
lists.add(new SimpleGrantedAuthority("add"));
lists.add(new SimpleGrantedAuthority("delete"));
lists.add(new SimpleGrantedAuthority("ROLE_ADMIN"));
return new User(username,passwordInDb,lists);
}
}
|
配置多种校验规则(对页面)
为了测试方便,首先在项目的webapp文件夹下面创建 a.html、b.html、c.html、d.html几个页面
修改spring-security.xml文件:
前提:<security:http auto-config=“true” use-expressions=“true”>
1
2
3
4
5
6
7
8
9
10
11
12
13
14
15
16
| <security:http auto-config="true" use-expressions="true">
<security:intercept-url pattern="/index.html" access="isAuthenticated()" />
<security:intercept-url pattern="/a.html" access="isAuthenticated()" />
<security:intercept-url pattern="/b.html" access="hasAuthority('add')" />
<security:intercept-url pattern="/c.html" access="hasRole('ROLE_ADMIN')" />
<security:intercept-url pattern="/d.html" access="hasRole('ABC')" />
</security:http>
|
测试:
登录后可以访问a.html,b.html,c.html,不能访问d.html
注解方式权限控制(对类)
Spring Security除了可以在配置文件中配置权限校验规则,还可以使用注解方式控制类中方法的调用。例如Controller中的某个方法要求必须具有某个权限才可以访问,此时就可以使用Spring Security框架提供的注解方式进行控制。
【路径】
1:在spring-security.xml文件中配置组件扫描和mvc的注解驱动,用于扫描Controller
2:在spring-security.xml文件中开启权限注解支持
3:创建Controller类并在Controller的方法上加入注解(@PreAuthorize)进行权限控制
实现步骤:
第一步:在spring-security.xml文件中配置组件扫描,用于扫描Controller
1
2
| <context:component-scan base-package="com"/>
<mvc:annotation-driven></mvc:annotation-driven>
|
第二步:在spring-security.xml文件中开启权限注解支持
1
2
|
<security:global-method-security pre-post-annotations="enabled" />
|
第三步:创建Controller类并在Controller的方法上加入注解(@PreAuthorize)进行权限控制
1
2
3
4
5
6
7
8
9
10
11
12
13
14
15
16
17
18
19
20
21
22
23
24
25
| @RestController
@RequestMapping("/hello")
public class HelloController {
@RequestMapping("/add")
@PreAuthorize("hasAuthority('add')")
public String add(){
System.out.println("add...");
return "success";
}
@RequestMapping("/update")
@PreAuthorize("hasRole('ROLE_ADMIN')")
public String update(){
System.out.println("update...");
return "success";
}
@RequestMapping("/delete")
@PreAuthorize("hasRole('ABC')")
public String delete(){
System.out.println("delete...");
return "success";
}
}
|
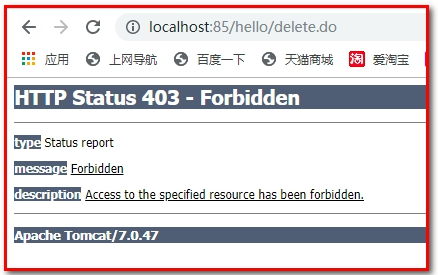
测试delete方法不能访问
退出登录
用户完成登录后Spring Security框架会记录当前用户认证状态为已认证状态,即表示用户登录成功了。那用户如何退出登录呢?我们可以在spring-security.xml文件中进行如下配置:
- index.html定义退出登录链接
- 在spring-security.xml定义
第一步:index.html定义退出登录链接
1
2
3
4
5
6
7
8
9
10
11
| <!DOCTYPE html>
<html lang="en">
<head>
<meta charset="UTF-8">
<title>Title</title>
</head>
<body>
登录成功!<br>
<a href="/logout.do">退出登录</a>
</body>
</html>
|
第二步:在spring-security.xml定义:
1
2
3
4
5
6
7
8
|
<security:logout logout-url="/logout.do"
logout-success-url="/login.html" invalidate-session="true"/>
|
通过上面的配置可以发现,如果用户要退出登录,只需要请求/logout.do这个URL地址就可以,同时会将当前session失效,最后页面会跳转到login.html页面。
1:配置可匿名访问的资源(不需要登录,权限 角色 就可以访问)
1
2
3
| <security:http security="none" pattern="/js/**"></security:http>
<security:http security="none" pattern="/css/**"></security:http>
<security:http security="none" pattern="/login.html"></security:http>
|
2:使用指定的登录页面(login.html)
1
2
3
4
5
6
7
| <security:form-login login-page="/login.html"
username-parameter="username"
password-parameter="password"
login-processing-url="/login.do"
default-target-url="/index.html"
authentication-failure-url="/login.html"
always-use-default-target="true"/>
|
3:从数据库查询用户信息
1
2
3
4
5
| <security:authentication-manager>
<security:authentication-provider user-service-ref="userService">
<security:password-encoder ref="bCryptPasswordEncoder"></security:password-encoder>
</security:authentication-provider>
</security:authentication-manager>
|
4:对密码进行加密
1
| <bean id="bCryptPasswordEncoder" class="org.springframework.security.crypto.bcrypt.BCryptPasswordEncoder"></bean>
|
5:配置多种校验规则(对访问的页面做权限控制)
1
2
3
4
5
| <security:intercept-url pattern="/index.html" access="isAuthenticated()"></security:intercept-url>
<security:intercept-url pattern="/a.html" access="isAuthenticated()"></security:intercept-url>
<security:intercept-url pattern="/b.html" access="hasAuthority('add')"></security:intercept-url>
<security:intercept-url pattern="/c.html" access="hasRole('ROLE_ADMIN')"></security:intercept-url>
<security:intercept-url pattern="/d.html" access="hasRole('ABC')"></security:intercept-url>
|
6:注解方式权限控制(对访问的Controller类做权限控制)
1
| <security:global-method-security pre-post-annotations="enabled"></security:global-method-security>
|
7:退出登录
1
| <security:logout logout-url="/logout.do" logout-success-url="/login.html" inv
|


